The kitchen remodel....oh what a great adventure that was. The hubby decided to do this project in the dead of winter, right after Christmas. But it's the only time he can take vacation, and we had been planning this project pretty much since the day I moved in. The kitchen was outdated. The house was built in 1941. And man-o-man the layers of history that we uncovered during this project, DISGUSTING and interesting at the same time.
Time Duration- 2 weeks!
So here is BIG project #1, the kitchen.
Before......
 |
| Kitchen table Nook! |
 |
| This is looking into our living room from the kitchen sink. |
 |
| On the other side of the fridge is the back door, and it blocked all the sunlight. |
 |

I guess you can say small and outdated....
The original plan was to purchase new cupboards. But me being the "crafty and frugal" one, I convinced the hubby to try and "redo" them. I figured if it didn't work or we didn't like them, we were only out paint and time.
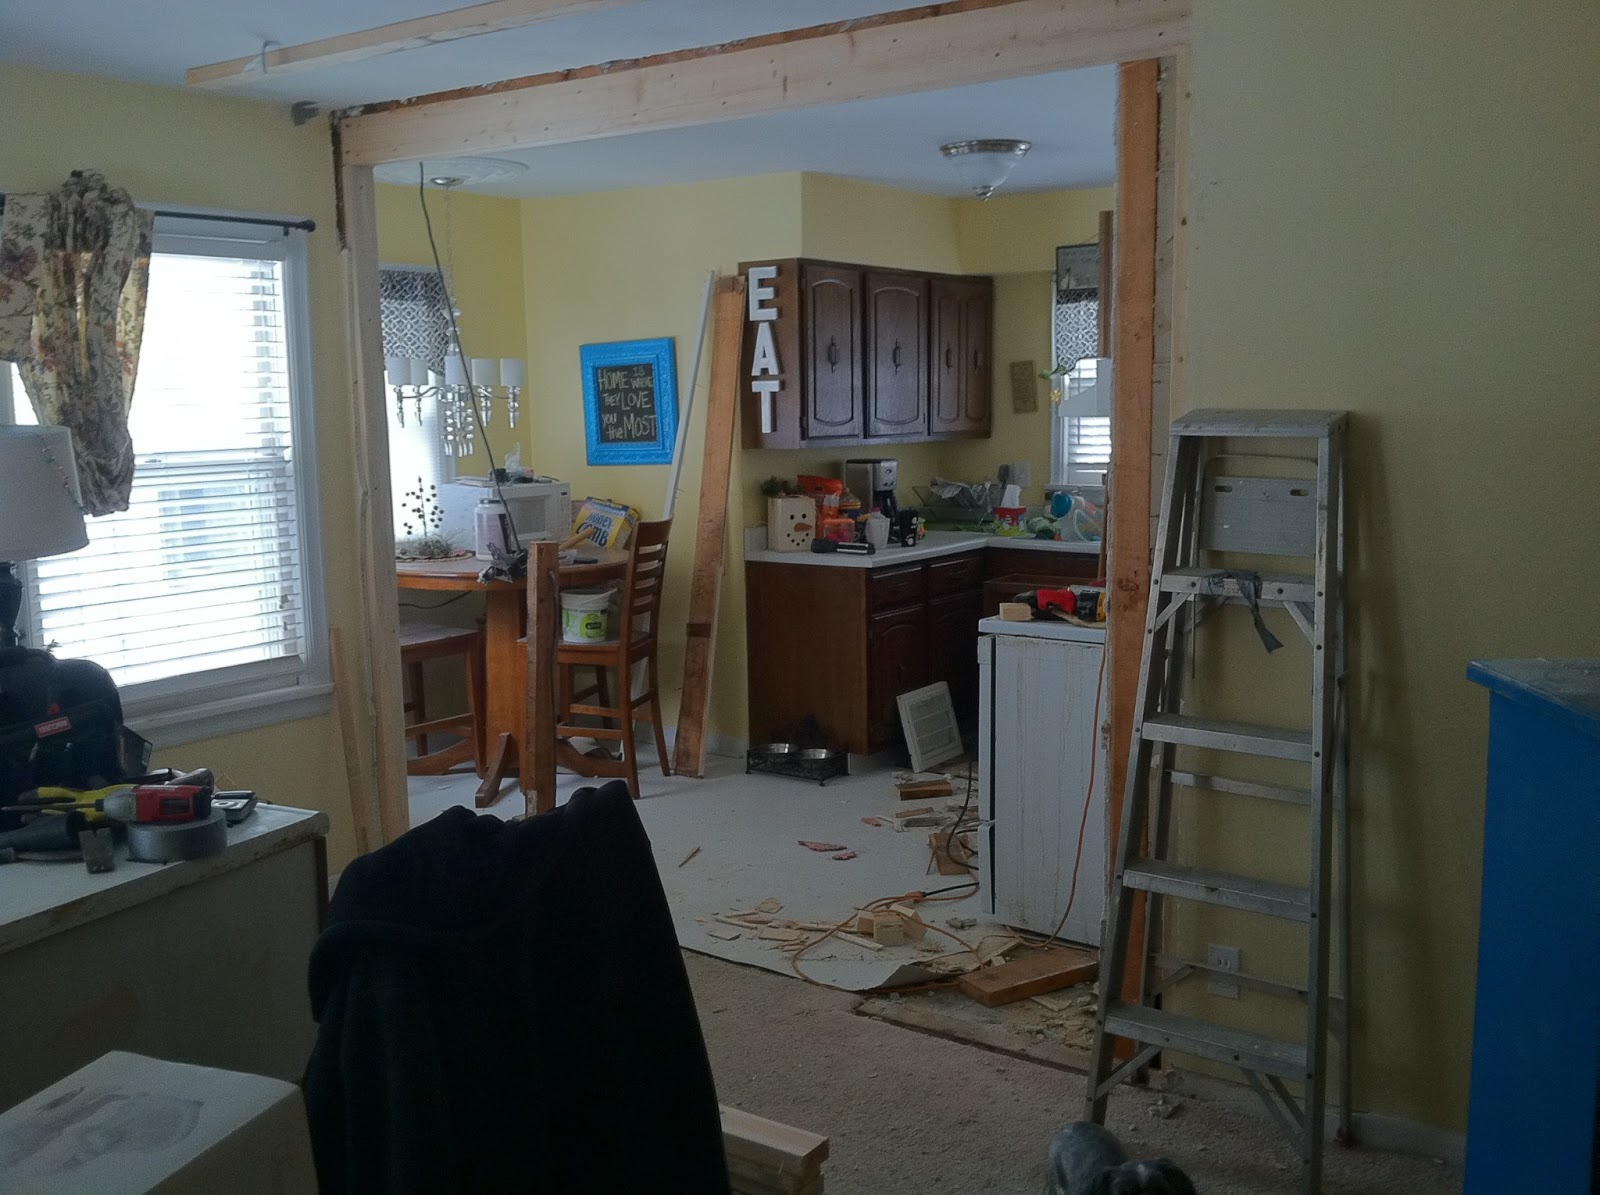
Phase 1- Demolition!
 |
| The boys started while I was at work, so I didn't hafta see the mess? Yeah RIGHT! LOL |
 |
| There's our Harley photo bombing! |
 |
| Jaylen...exhausted! Oh and check out the wallpaper that was behind a cabinet. GROOVY huh! |
 |
| This was under the bottom cabinet. Among layers and layers of linoleum and carpet. The smell was horrific! |
 Support Beams UP!
 |
| Fridge is out and replaced it with a cabinet that was by the stove. |
 |
| I chose the Color Antique Silver from Menards. I was worried it might have been too dark but was very pleased we went with it! |
Floor Time! Oh, then we decided to tare out the living room carpet. And went with the hard wood floors throughout!
And AFTER....
 |
| I loved these plates but the 3M sticky things didn't hold up, and they fell and broke. But I found new ones, and I have another post about hanging plates! They ain't going nowhere this time! The light fixture was from Lowes, and the ceiling piece was a garage sale find for $3 (brand new)! |
 |
| This window was a LUCKY Craigslist find! |
 |
| We hung 2 shelves in place of a cabinet that was there. |
 |
| And I thought this was the perfect sign for my new kitchen!!!! |
Phase 1 cost $300.00


You guys did a fantastic job! Visiting from Tuesdays Treasures L-)
ReplyDeleteThank You for visiting!! And thank you the compliment!
DeleteShelly
Outstanding! It's a whole new world in there.
ReplyDeleteThank You! We were pleased too! Thanks for stopping by!
DeleteShelly
Oh this is wonderful. What a fabulous transformation. I would love for you to link this to my Inspire Me party that is ongoing. - - -http://www.astrollthrulife.net/2013/05/164th-inspire-me-tuesday.html Hugs, Marty
ReplyDeleteOH I LOVE THIS!!!!!!!!!!!!!!!!!!!!
ReplyDeleteSo glad you shared this one!!!!
It looks amazing, what a transformation!
Thanks!!! Its still in progress but it's coming along!
DeleteShelly, thanks for stopping by my blog. OMG! Talk about transformations - what an undertaking you had on your hands. It turned out absolutely gorgeous. Jane
ReplyDeleteThanks!! Thanks for checking ours out too!! It was quite the project! I probably wouldn't recommend anyone doing it in the dead of winter with 2ft snow outside. Sure did limit work space!
DeleteI forgot to mention, I love that board you found in the wall!
ReplyDeleteThe light blue one from Junkstock? Check this out!!
Deletehttp://minettesmaze.blogspot.com/2013/06/ok-i-hafta-say-i-cant-wait-i-have-been.html
How cool is your kitchen! I love the before and after pictures. They're so fun. It really looks awesome. Congrats! I am sure you enjoy it so much :)
ReplyDeleteThank you Kelly
Deleteyou mentioned that you used "kitchen paint" for the cupboards... was that an oil based paint?
ReplyDeleteIt was Dutch Boy Cabinet and Trim Latex paint. And we purchased that from Menards.
DeleteThis is great!! You did fabulous. And bless your heart, I don't see a dishwasher. We haven't had one 11 of the 12 years we've been married. I was actually looking at your Reno to see if I could steal some inspiration. Thank you!!
ReplyDeleteThis is great!! You did fabulous. And bless your heart, I don't see a dishwasher!! We haven't had one the 11 of 12 years we've been married. LOL. So I came here looking for insration and I found it!! Thank you!
ReplyDeleteIt is beautiful! We are also in the middle of gutting our kitchen and I was wondering if u had your cabinets spray painted or rolled?
ReplyDeleteIt is beautiful! Did u spray the cabinets or roll them?
ReplyDeleteYou guys did a great job! It looks fabulous!
ReplyDelete